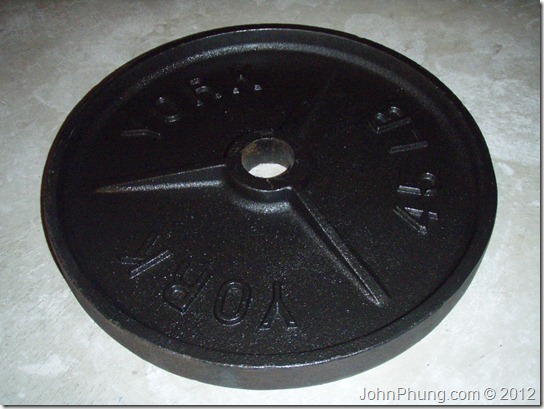
Before...
A while back I got scored a sweet deal on a bunch of used Olympic plates from an online classified ad. The lady was selling 12x45lbs plates for only $50...so cheap!
It was a great price, but the plates themselves were not in great shape.
They were stored in a shed, and most of the plates were rusted.
It was too good of a deal to pass up, so I bought them with the intention of refinishing them afterward.
I’ve read you could soak the plates in Coca-cola to remove the rust (something to do with the phosphoric acid in Coke that can apparently get rid of rust), but that seemed a little messy and is a waste of something I would rather drink. I’m a little skeptical and wasn’t sure how well this would work, and I wanted something that would surely take care of the rust problem, along with preventing rust in the future.
After some research online, I discovered an easy way to make rusty weight look as good as new. Turns out there’s a special type of paint made by Tremclad (the Canadian version of Rustoleum) that you can apply onto surface rust, that will penetrating rusty surfaces and inhibiting rust. On top of that, there’s no need for a primer and there’s many different colors to choose from. I went with the hammertone black because it looked like the original color of the York Olympic plates.
There’s a few steps and tools you’ll need to remove rust and refinish weight plates. Here’s how I did it:
Tools You’ll Need
- Wire Brush (I’ve read sandpaper works as well)
- Mineral spirits
- Rust preventive paint (I went for Tremclad’s/Rustoleum’s, but I've heard Krylon works too). I needed 2 cans of spray paint for 6 plates.
- Some old rags
- Cardboard
- Dust/face mask (breathing in the fine rust particles or any spray paint is probably not good for your health).
Preparation
Take large pieces of cardboard and lay them out onto the floor.
Make sure that there is no space in between the pieces of cardboard, or you’ll end up getting spray paint onto the floor.
Place the weights on top of the cardboard. The weights should be spaced apart, so it will be easier to paint the side of the plates.
Steps
- Take a wire brush and scrub the Olympic plates to get rid of any loose rust and dirt. Make sure to scrub along the sides of the plates, along with the insides of the hole. If your wire brush is too large for the hole, sandpaper will work.

- Pour a bit of mineral spirits onto the plates and wipe them clean with a rag. Supposedly what this does is remove any excess dirt and oils so that the paint will stick to the metal. Do this on both sides and let it dry. I’m not sure how long it takes to try since I left it overnight.
- With a can of Tremclad (or Rustoleum), spray coat of paint onto the Olympic plates. I’ve never used spray paint before, so I just sprayed from side to side, working my way from top to bottom. Don’t forget to spray on the sides of the plates, and inside the hole.I let it dry for about 15-20 minutes before painting on a second layer.

I repeated this for a total of 3 coats. After the 3rd coat of paint, I let it dry over night before flipping them over and painting the other side.
Before & After
Not bad!
The front and back surface of the Olympic plates looked pretty good, but the inside of the hole and the side of the plates were still a little rusty.
Looking back, I would have taken some wooden blocks and place them underneath the plates before painting them. It would have been easier to spray paint the side of the plates.
Alternatively, I would have painted the sides and inside the hole using a brush and the paint-can version of Tremclad.
There you have it - cheap, rusty Olympic weights looking as good as new!


